REVIEW · PORTO
Porto: Acrylic and Oil Painting Class with a Local Artist
Book on GetYourGuide →Operated by Emanuel Ribeiro · Bookable on GetYourGuide
A brushstroke can change how you see a city.
This Porto class focuses on the basics that matter fast: acrylic and oil techniques plus real-world guidance from a local artist who paints Porto streets and everyday life.
I like that you get step-by-step help with color mixing (including quantities) and the practical stuff that beginners usually miss, like using brushes correctly and setting up your painting with an easel. One thing to consider: it’s not for very young kids (no children under 10), so if you’re traveling with younger children, this won’t fit.
In This Review
- Key things that make this class worth it
- Where the lesson starts near S. Bento, and why that matters
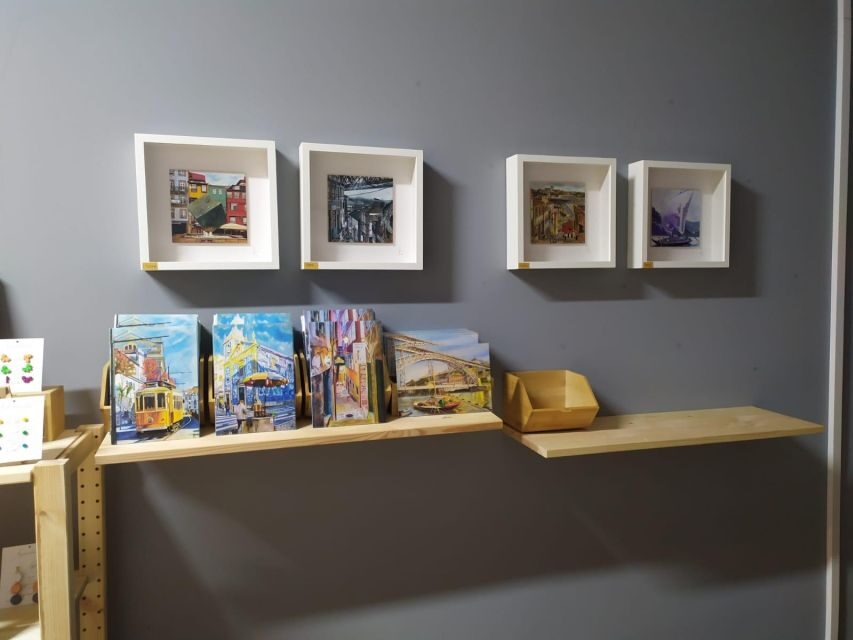
- Boiler Studio and the Emanuel Ribeiro factor
- Acrylic vs. Oil: the lesson’s core skill set
- Color mixing you can actually repeat at home
- Using brushes and an easel without fighting your tools
- Surface prep and accessories: the unglamorous stuff that makes a difference
- The pacing: 2.5 hours that stays fun and stays focused
- Price and value: why $53 makes sense for this setup
- Who this class suits best (and who should skip it)
- A quick practical game plan before you go
- Should you book this Porto acrylic and oil class?
- FAQ
- FAQ
- How long is the painting class in Porto?
- Where is the meeting point?
- How many people are in the class?
- What languages are offered?
- What painting materials and tools are included?
- Do I learn both acrylic and oil painting?
- Is there anything included besides instruction?
- What is the price per person?
- Is it suitable for children?
- Is the activity wheelchair accessible?
Key things that make this class worth it
- Small group of up to 5 means you can actually ask questions and get hands-on corrections.
- A local working artist (Emanuel Ribeiro) brings Porto’s light and street life into the lesson.
- Both acrylic and oil fundamentals so you’re not stuck learning only one medium.
- Brush technique + color value are taught as skills, not just theory.
- Easel use and surface prep so your setup works with you, not against you.
- Cocktails included add a relaxed studio vibe without turning it into a party.
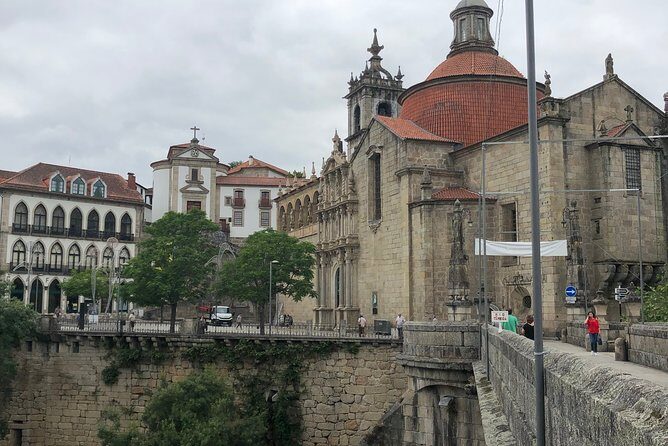
Where the lesson starts near S. Bento, and why that matters
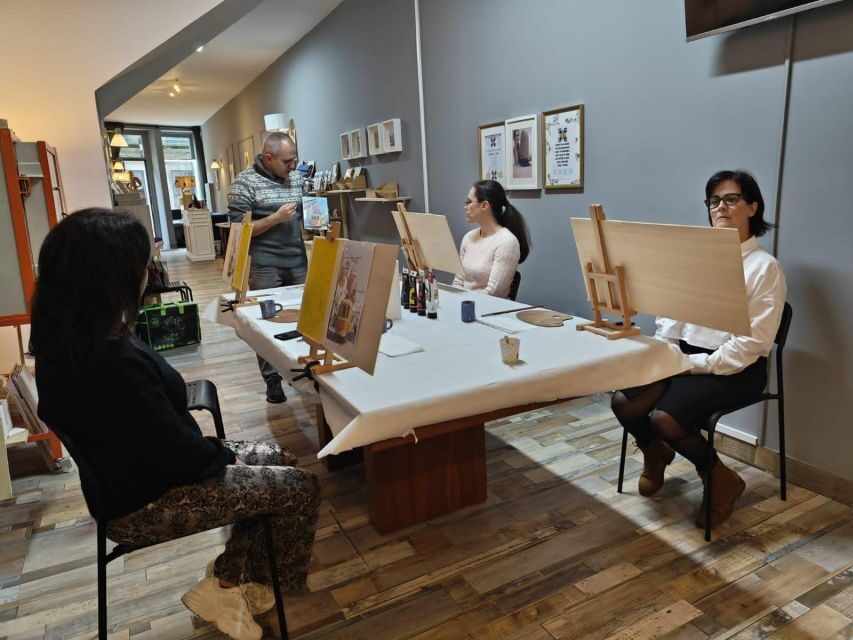
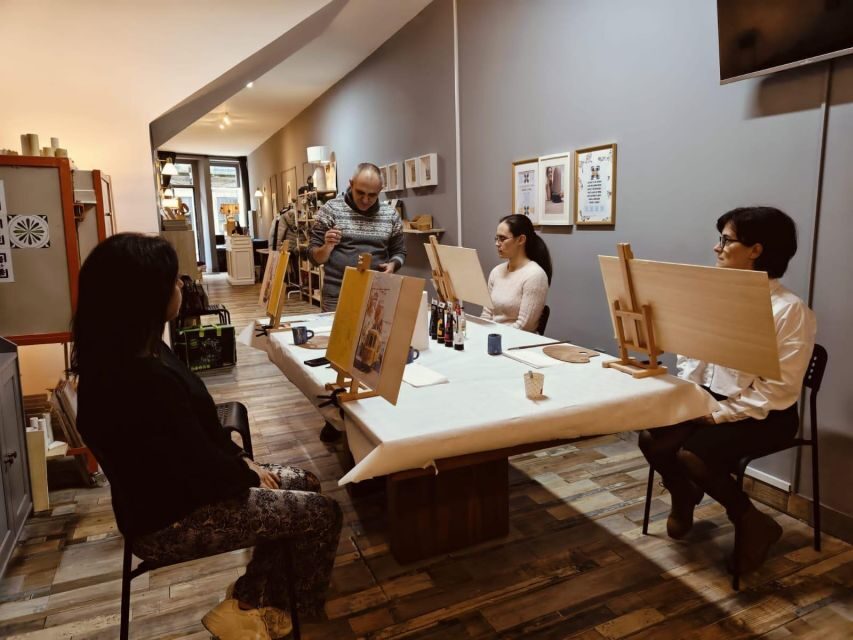
Your morning or afternoon begins in downtown Porto, near S. Bento Train Station. The meeting point is on a street close to the station, so you’re not stuck hunting for a place out in the suburbs. If you’re using public transit or you’re already in the historic center, this is convenient.
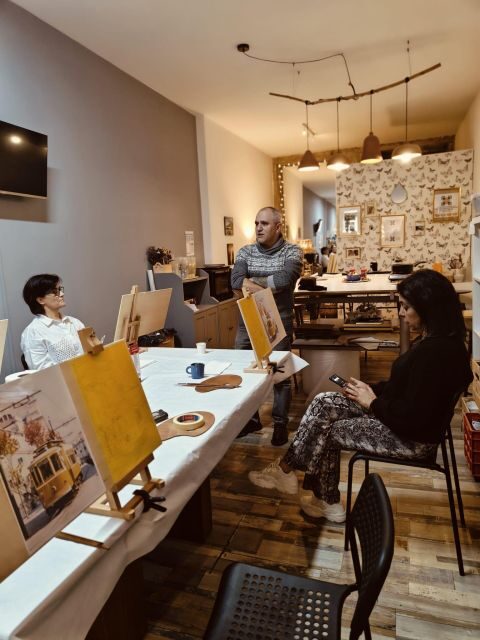
From there, you’ll head into the studio atmosphere. The class is tied to Boiler Studio, and the instructor, Emanuel Ribeiro, is also out on the streets making art. That combination matters. You’re not just learning paint tricks in a vacuum—you’re working in a place where art is happening daily, and where the city itself is part of the creative fuel.
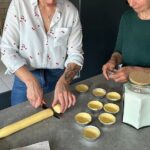
Also, the group size is capped at five participants. That’s a big deal in a hands-on medium like painting. With larger classes, you spend time waiting your turn. Here, you can stay engaged for the full 2.5 hours.
You can also read our reviews of more tours and experiences in Porto


Boiler Studio and the Emanuel Ribeiro factor
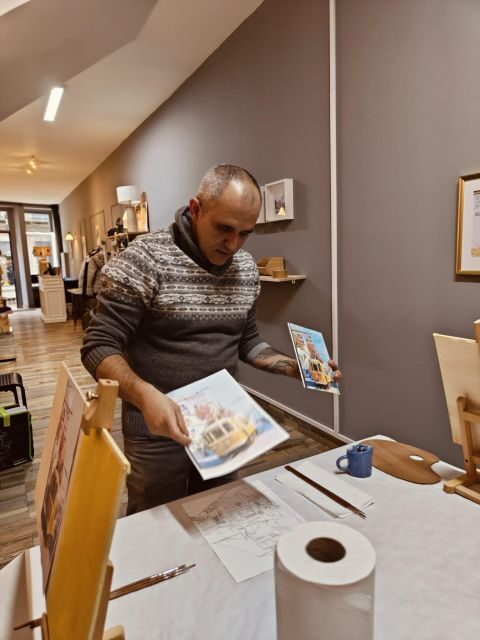
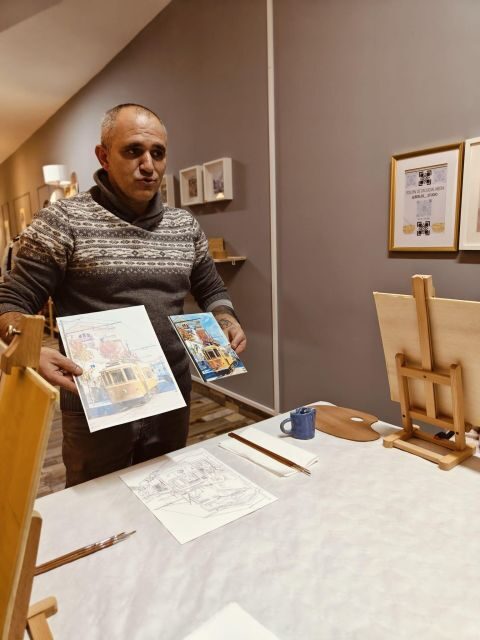
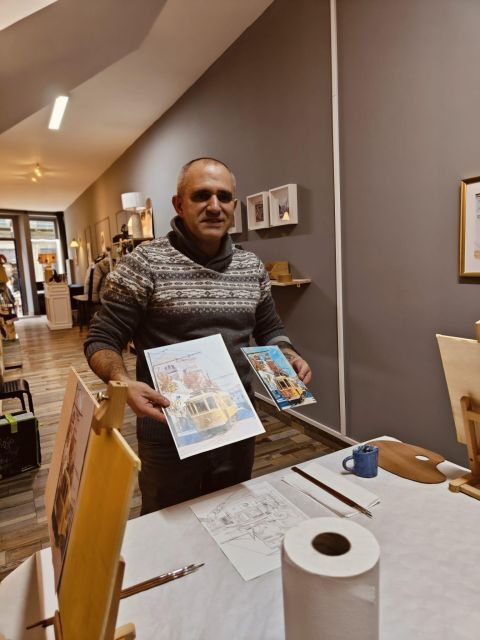
This isn’t a generic art class taught by someone who once liked painting. The instruction comes from Emanuel Ribeiro, a visual artist known for making works that reflect Porto’s everyday life and city light. In practice, that shapes the tone: the lesson is technical, but it’s also human.
In the reviews, Emanuel stands out for conversation as much as for craft. People mention how he’s charming and easy to talk with—someone who loves discussing art and life while guiding you at the easel. That matters because beginners often get shy with something as physical as painting. When the teacher talks with you, you’re more likely to ask why something looks wrong and what to do next.
The language options (English, Portuguese, and Spanish) also help. You won’t feel locked out if you’re not fluent in Portuguese, and it tends to make the room calmer because you can follow instructions clearly.
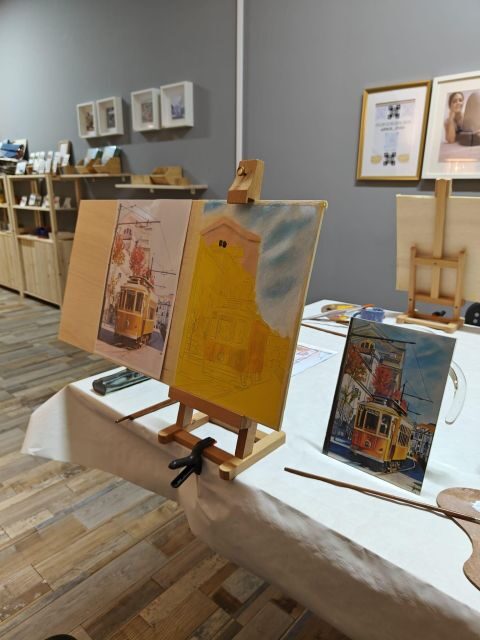
Acrylic vs. Oil: the lesson’s core skill set
The class covers fundamental techniques for both acrylic and oil painting, which is a smart structure for anyone trying to understand what’s going on under the hood.
Here’s what that means in real terms. You’re not just told which bottle to open. You learn:
- How to use brushes correctly
- The value of color—how shades and tones work together
- How to mix colors and how much to mix for the amount you need
- How to work with an easel and the materials used by painters
- How to prepare surfaces for painting and use painting accessories
The “fundamental” part is key. Beginners usually jump straight to copying an image or trying to create instant realism. This approach teaches you to build the painting logically: brush handling, then color decisions, then the physical setup that lets you work comfortably and accurately.
If you’ve ever watched someone paint and thought, That looks effortless, this lesson helps you see the small mechanics behind the result. A big part of that is color mixing and quantities—people often mix too little, run out, or keep changing the mix, which makes colors stop matching.
Color mixing you can actually repeat at home

One of the most praised parts of the experience is how Emanuel explains working with colors—especially if you’re coming in with limited experience. If you’ve only done black-and-white work, you’ll likely love the way the lesson translates color into manageable steps. Instead of vague encouragement, you get tools you can reuse back home.
You’ll learn about:
- Mixing colors so they look right together
- Understanding color quantities, so you don’t waste paint or stall mid-stroke
- Using brushwork in a way that supports the color you’re trying to build
This is valuable because color is where most first attempts fall apart. Even when your drawing is fine, color can look flat if you don’t understand tone relationships. This class focuses on that value of color—the relationships between light and dark and how they affect depth.
In the feedback, people specifically mention being guided step by step on mixing and creating a painting with depth. That depth isn’t just luck or good eyesight. It comes from making consistent color choices and layering/handling paint intentionally.
Practical tip: ask your teacher what to do when something looks off after it dries. You’ll get more value if you treat the class like a problem-solving session, not just a craft activity.
Using brushes and an easel without fighting your tools

You’ll learn the correct way to use brushes, and it covers more than holding them. Brush technique affects everything: the texture you lay down, how smooth or broken your edges look, and how easily you can correct mistakes.
You’ll also learn easel usage. That’s one of those details that sounds minor until you’ve tried to paint on a tabletop or in an awkward posture. With an easel, the painting setup changes how you see your work and how freely your arm moves. The lesson teaches you how to use it along with the materials in a way that feels workable for beginners.
If you’ve never used an easel, this is a confidence builder. When you know where your canvas sits and how your arm naturally moves, you waste less time adjusting and more time painting.


Surface prep and accessories: the unglamorous stuff that makes a difference
A lot of people skip the behind-the-scenes work. This class doesn’t. You learn about preparing surfaces and using accessories used in professional painting.
Why should you care? Because surface prep affects how paint grips and behaves. If the surface isn’t ready, paint can act differently than you expect—dragging, separating, or losing the look you were aiming for. Even for a short 2.5-hour lesson, learning the logic behind preparation gives you a base you can carry into future attempts.
Accessories are covered too. That usually means learning what tools exist beyond the obvious brush and paint—things that help you control the process and keep your workflow clean and efficient.
This is one of those beginner-friendly advantages: you don’t just learn how to make marks. You learn how painters set themselves up to keep working without chaos.
The pacing: 2.5 hours that stays fun and stays focused
The class runs for 2.5 hours. That’s long enough to actually make a painting progress, but short enough that you won’t feel drained.
In the review feedback, the experience held attention even for a mixed group that included teens and a 10-year-old. The comment that kids didn’t get up from their chairs for most of the session is a strong sign that the structure keeps people engaged rather than handing them a worksheet and sending them off.
So here’s what you should expect from the flow:
- Meet the instructor and get introduced to the session
- Learn brush use and how to think about color
- Mix colors with guided help, including figuring out quantities
- Work at your easel using the painting materials and accessories provided
- Keep refining as you paint, with real-time correction
If you’re nervous about painting, don’t worry. The point of the class is instruction. It’s set up for beginners, and the teaching style described is patient and step by step.
Price and value: why $53 makes sense for this setup
The price is $53 per person for a 2.5-hour class. That’s a solid value when you compare what’s included: graduate-level teacher guidance, all painting materials and accessories, easel use, and cocktails.
Let’s break down why that matters:
- Materials are provided, so you’re not spending money on a starter kit just to see if you like painting.
- Easel instruction is included, so you’re not learning everything the hard way.
- A small group keeps the attention on you, which usually drives up the value of the experience.
- Cocktails add comfort and a social studio feel—without turning the lesson into a generic event.
If you want a souvenir, this class is also a good way to create something yourself during the trip. Even if you never paint again after Porto, you’ll leave with a stronger sense of how color and technique work.
Who this class suits best (and who should skip it)
This experience fits best if you want a hands-on creative activity and you like learning by doing.
You’ll likely enjoy it if:
- You’re a beginner or have limited experience with color
- You want a clear method for mixing paint and understanding tones
- You like short, structured classes with a real artist guiding you
- You want an authentic Porto connection through a local working painter
It may not be for you if:
- You’re traveling with children under 10
- You want a purely sightseeing activity with minimal sitting time
- You’re hoping for a long, open-ended studio session with no teaching
The classroom is designed for a small group and a teaching pace, so come ready to focus for the full 2.5 hours.
A quick practical game plan before you go
You don’t need to over-prepare, but a couple habits will make your experience smoother.
- Bring curiosity more than confidence. If you don’t know anything about oils or acrylics, that’s normal.
- Ask how to fix a color you don’t like. Mixing and correction are part of the process here.
- Pay attention to the brush technique instruction early. Those first corrections usually prevent frustration later.
- If you’re traveling with friends, consider going as a single group member. With a small class, your teacher’s attention can shift fast when people split attention.
And if you’re the type who worries about getting it wrong: that worry is a sign you care. In this class, caring is helpful because the whole point is learning what to do next.
Should you book this Porto acrylic and oil class?
I think it’s worth booking if you want a guided, beginner-friendly painting class with a local working artist and a clear focus on technique. The most praised parts—the patient step-by-step guidance, the way color mixing is taught, and the friendly conversation around art and life—are exactly what make this feel like more than a hobby workshop.
If you want to spend your time in Porto learning something you can reuse later at home, this is a strong choice. It’s short, structured, and small-group, with the essentials covered: brushes, color value, mixing, easel use, surface prep, and accessories. For $53, with materials and easel included, you’re paying for instruction and hands-on setup, not just sitting in a room.
FAQ
FAQ
How long is the painting class in Porto?
The class lasts 2.5 hours.
Where is the meeting point?
The meeting point is a street near S. Bento Train Station.
How many people are in the class?
It’s a small group limited to 5 participants.
What languages are offered?
The instructor can teach in English, Portuguese, and Spanish.
What painting materials and tools are included?
All painting materials and accessories are included, and you’ll also receive easel usage instruction.
Do I learn both acrylic and oil painting?
Yes, the class covers fundamental techniques for both acrylic and oil painting.
Is there anything included besides instruction?
Yes. Cocktails are included.
What is the price per person?
The price is $53 per person.
Is it suitable for children?
It’s not suitable for children under 10, and babies under 1 are also not suitable.
Is the activity wheelchair accessible?
Yes, it’s listed as wheelchair accessible.